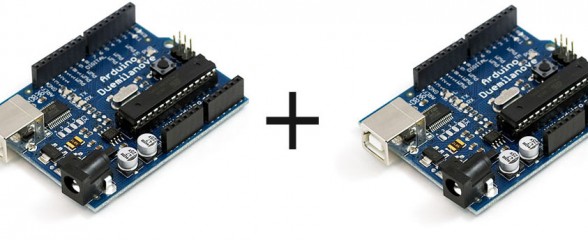
The purpose of this library is to make it easy for the everyday Arduino user working on projects with multiple Arduinos communicating with each other and sharing data. I had many people ask me for the code I used in my PS2X library example that sent PS2 Controller values wirelessly to my SAGAR robot. It got to be tiresome answering the questions and I had an idea to write a library to help the inexperienced with micro controller communications. This is a easy to use and no frills way to send data between two Arduinos.
In most of my own projects I define and write my own NMEA standard communication protocols. This makes communications human readable and easy to debug, but proves wasteful with bandwidth and processing power so it’s not right for every application. Binary communications is much more efficient and versatile, but requires careful handling. This library abstracts the finer points of packetized serial communication away from the user so it easy to use and understand.
To use the library, simple define all the data types you want to share inside a data structure. This keeps all the data stored together in memory.
struct SEND_DATA_STRUCTURE{ //put your variable definitions here for the data you want to send //THIS MUST BE EXACTLY THE SAME ON THE OTHER ARDUINO int blinks; int pause; };
When requested, the library will send all the binary data in the structure to another Arduino via serial with a checksum to avoid transfer errors.
void loop(){ //this is how you access the variables. [name of the group].[variable name] mydata.blinks = random(5); mydata.pause = random(5); //send the data ET.sendData(); delay(10000); }
The receiving Arduino will verify the checksum, and copy the new data onto a identical structure in it’s memory.
void loop(){ //check and see if a data packet has come in. if(ET.receiveData()){ //this is how you access the variables. [name of the group].[variable name] //since we have data, we will blink it out. for(int i = mydata.blinks; i>0; i--){ digitalWrite(13, HIGH); delay(mydata.pause * 100); digitalWrite(13, LOW); delay(mydata.pause * 100); } } delay(2500); }
It’s important to make sure the structure is the same on both Arduinos for this to work. Now sharing data between Arduinos is easy without having to define and program your own communications protocol and have to worry about syncing or transmit errors. EasyTransfer will do that for you.
Using Structures to hold the data allows for versatile communications by allowing any type and number of data points to be shared, as long as the whole structure is under 255 bytes. You could define int’s, arrays, longs, etc inside the structure and share the data. It’s also possible to create two way communications by defining two sets of structs on each end and creating two objects using the library. I will have an example of that up shortly.
You can download the library and example below. The example requires two Arduino boards to be connected to each other via their Uarts. One will create two random numbers and send the data to the other that will flash out a sequence of flashes based on those numbers. The first one will also flash out the same sequence.
Now it’s easier to pick which Serial port to use; Serial, Serial1, etc. AND support for the NewSoftSerial library for creating software serial ports on any pin. EasyTransfer is for hardware serial, SoftEasyTransfer is for software; each has there own set of examples. There’s also an example for two way communications using the library.
Source Code available on GitHub project pages.
Or Direct Download
UPDATE
Thanks to Kumy, there’s now an I2C version of EasyTransfer. There’s also an experimental VirtualWire version for use with those cheap low frequency radios. All are in the single download zip file above.
To install the Library, open the zip file and transfer the EasyTransfer folder into your Arduino ‘libraries’ folder. Then follow the examples to add the code to your project. If you have any problems or questions, let me know in the Support Forum.
Need Help?
Please use the Support Forum to ask for help. Don’t use the comments below.
This work is licensed under a Creative Commons Attribution-ShareAlike 3.0 Unported License.
Warning: Use of undefined constant single - assumed 'single' (this will throw an Error in a future version of PHP) in /homepages/46/d285670699/htdocs/bill/wp-content/themes/wordpress_survive/single.php on line 63
Warning: count(): Parameter must be an array or an object that implements Countable in /homepages/46/d285670699/htdocs/bill/wp-includes/comment.php on line 879
443 Comments.
Yes, sounds like exactly what I wrote it for. Let me know if you have problems / questions.
The Energy Monitor which provides the data, currently is set at Serial.begin (9600); the same speed as this sketch. But the Ethernet enabled board runs at a baud rate of 57600 (Ethercard library).
Is this a problem?
Hi,
Wil your lib work on the combination of an uno and a mega2560? it only seems to work on 2 unos.
Greetings Gerd
It should Gerdv, I don’t know why it wouldn’t. Can you send a single character back and forth over serial not using my library?
Hey Bill,
It works indeed. Must have done something wrong on first attempt. Re-implemented the whole thing and it works like a charm on my homemade 12 channel rc UAV radio system.
Love this lib. Great for all purpose communications.
Thanks a lot!
Gerd, glad it works! Of you ever document your setup, please let me know. I’ve been wanting to determine performance on a setup like that. You will save me from doing it.
Hey Bill,
I am using your ET lib for the 3th time.
This time for some home-automation system in a RC-plane hobby/clubhouse. Hooked up all lights, heating, ventilation, machinery, radio, sensors, rtc, alarm, computers and so on to a 2560 and use the ET-lib for communication to the operator panel (hitachi LCD on a uno).
Many thanks again for this great lib.
Would be nice to see a processing version in the future.
Gerd
Hi Bill, I have been sending multiple sensor data in a packet from the 1st arduino the the 2nd. Now I am planning to send switch position information from the 2nd arduino back to the 1st to control some camera functions. Should I be declaring the name of the Send and receive structures to be the same in each othe arduinos or should they be different? Are there any configurations that I need to follow in terms of delay time between the 2 packets of data being sent back and forth? Thanks in advance
Hi Arjun, what You did is just what I am looking for. Would You please send me an example of Your sketch from master and slave? Or just post it here? I think there will be a great interest.
Thanks a lot
Berry
Paul, does the ethernet enabled Arduino need to use it’s serial uart to talk to the ethernet chip? Are you sure you can use it for something else? It seems odd that it’s hard coded for a certain speed already.
Sorry Bill, this is my first microprocessor project, and I can’t answer your question.
I’m the guy with the Weller as old as you, so valves are more my forte!
The sketch is the Pachube version – http://bit.ly/oPNFvQ
I will load it up tomorrow, amended to 9600 and see if the ethernet works with sample data.
Paul, I shot you an email, let me know if you don’t receive it.
You need two differently named structs for send and receive. And you should be calling the receive function in each Arduino more often then the send function. Take a look at my two way example in the library.
Bill, I’m sorry, I did not know that there was a 2 way example in the library. Will take a look and let you know. Thanks.
No problem Arjun, let me know if you have any questions after you take a look at it. What might confuse you is (I think) i created two similar structs with different names. So I only had to describe the struct once in the code, but I created two different instances of it with two different names.
Is EasyTransfer work over Arduino+XBee wireless communication? I haven’t been able to get it to work.
If the xbee’s are configured as a simple serial link, then yes this library will work. Test to make sure you can send a single character through the link without using my library.
Hi Bill, I can send a single character through the serial link without using EasyTransfer library. I just found a strange behavior, if the delay time in EasyTransfer_TX_Example.pde is under 5000mS, it will work, but it won’t work if it’s over 5000mS. I think it could be XBee’s problem.
Yeah, I’ve observed this. Watch the RSSI led on the Xbees. I bet it will go out. It seems the Xbees ‘go to sleep’ or something if there’s not enough traffic. And they tend to drop characters when woken back up at first.
Bill, you are right. There is a ST parameter in the XBee modem configuration, it’s default value is 0x1388 (5000 in decimal), measured in MS. After increase the value of ST parameter, it is work now. Thanks for your help. 🙂
The description of ST parameter in X-CTU is as follows:
“Set/read time period of inactivity (no serial or RF data is sent or received) before activating Sleep Mode. The ST parameter is used only with Cyclic Sleep settings (SM=4-5).
RANGE:0X1-0XFFFE X 1 MS”
Glad to help! And thanks for telling me this, now I can fix my xbee as well.
FYI. I have written an introduction to EasyTransfer Library and EasyTransfer over XBee wireless communcation, posted on my blog:
1. http://coopermaa2nd.blogspot.com/2011/08/easytransfer-library-for-arduino.html
2. http://coopermaa2nd.blogspot.com/2011/08/easytransfer-over-xbee-wireles.html
I forgot to say, these two posts were written in chinese.
Hello, I try to using your library to control a remote plane. I need two way communication for telemetry and control.
I make a test with an arduino ATMEG328 + XBEE SHIELD (XBEE SERIE 1) and XBEE adapter with X-CTU. A the frames a send but if i send from the loop a “Serial.println(” “);” after 10 loops approximately nothing is send. I unplug and replug AC to see incoming data and stopping again!
If i use exemple like this :
mydata.blinks = random(5);
mydata.pause = random(5);
//send the data
ET.sendData();
delay(10);
i can see in X-CTU all the data without stop.
Could you help me to identify what’s wrong.
François
Francious, I’m having a hard time following you.
Are you saying when you test your setup with just a Serial.println() you don’t always get a response? Or are you trying to combine a Serial.println with my library?
Also, you need to make sure the delay in your receive loop is shorter then your send loop or data will be lost.
I Sorry, i was tired.
In this exemple
void loop(){
//this is how you access the variables. [name of the group].[variable name]
mydata.blinks = random(5);
mydata.pause = random(5);
//send the data
ET.sendData();
//Just for fun, we will blink it out too
/* for(int i = mydata.blinks; i>0; i–){
digitalWrite(13, HIGH);
delay(mydata.pause * 100);
digitalWrite(13, LOW);
delay(mydata.pause * 100);
}
*/
delay(10);
Serial.println(“ok “);
}
datas were send but after few loops nothing arrive in X-CTU. But if i send without Serial.println no probleme no stop.
Do you think your library is speed enough to support the remote control of a plane?
In X-CTU, you are watching the binary data by clicking “Show HEX”, right?
I made the same changes in my example, and the data never stops. Try sending me your pde file to the email address at the bottom of the page.
As far as speed, I ran a test. Assuming you read from 6 analog pins to get 6 ‘joystick’ values and send 6 bytes (255 servo positions per channel) to a receiver at 19200 baud and set 6 servos, it would take about 5-6ms from start to finish. A regular RC PPM setup refreshes at 50Hz or every 20ms. So my library is faster, not accounting for delays in the Xbees, but I don’t think they would be that laggy.
Hi does it work with float?
For exemple
mydata.blinks = 10;
mydata.pause = 2300.10;
HEX repesentation
06 0A 0F 45 1D
SIZE 10 2300.10 Checksum
How from 0F 45 do you rebuild 2300.10?
Thx
LABAT,
The trick with the library is that it just ‘photocopies’ a section of memory and sends it to another Arduino. The receiving Arduino should know how to handle the data if you made the structs the same on both Arduinos (that’s why it so important they be the same). The library doesn’t translate the binary data, it leaves it as is. The GCC compiler handles translating raw binary to the data type defined.
Hey Bill
This is what I am looking for I have one feature though. Would you care to extend it to work with processing.org (java). This way it would be possible to use it on the laptop and on the mobile android phone.
Hi Bill,
I am using your library to control my Dagu Rover 5 Project.
This great library allows me to send drive, direction & speed commands to my Rover an then for the Rover to send back sensor data to the controllers LCD.
What would be great would be a library. For processing. I know there has been request for this feature.
I have a mipsel netbook (debian) and Android Tablet which I would like to use as the controller & receiver for the sensor data.
I am also in the process of creating a Basic Remote using an Attiny 4313. The basic sketch compiles but I haven’t had time to build a Prototype Board.
I will post a few pick and the source code for the project soon.
Thanks again for the Library.
Hi Bill.
nice library, what disitance do you think the two arduinos can communicate.
Kim, physical distance will be a result of the radio system you choose to use. A better radio link will reach further.
i was thinking about using twisted pair wires. do you think it will work at a distance of 100 mts?
To go to 100m you better convert the TTL data to TTY data with some simple electronics (constant current so no voltage drops/EMI).
Kim, twisted pair only buys you more distance if the signal is a differential signal. Just using twisted pair an wiring it to the Arduino’s serial port won’t work that well. You should try it, and you might get lucky, but I doubt it.
I would use radios instead, or is there some other requirement that disallows radios?
Hi Bill.
Great job. But I have a question: How can I transfer a text?
I want to use Your library to communicate bidirectional with an Arduino as a room-controller in my homeAutomation project. For error messages a want to send plain words. How can I do that?
Hi, Berry,
I work as a programmer in the industrial automation sector. Common practice (and the simpellest)for error messaging is that the display MCU (arduino) contains all the text and the main CPU (controlling and supervising the actual the process) sends ( a sequence of) active error numbers to the display MCU.
Acknowledge / reset commands and so on can be sent in the other direction
This method is only interesting if you have lots of messages. For only a hand full of them you better use some booleans to trigger the messagges seperately but still store the text in you displays MCU.
Hope this makes sense.
Met vriendelijke groeten,
Gerd
Hi Gerd,
Thank You for Your fast reply.
How will it look like to use some booleans, for example to send “Hello Worrld” from the master to the slave?
I hope You can help me.
Regards Andreas
Hi Berry,
What Gerd suggests is that you have a library of possible error messages on either end. Then, use one byte to represent the ‘error state’ that is sent between the two. If there’s no errors, error = 0. If error = 10, then display the error message that correlates to error 10.
The reason I wrote this library is because the transfer of text is very inefficient. Each letter in a sentence requires a byte. To try to use my library and transfer would be very tricky. But using a byte to represent an error state, you ca achieve the same effect easily.