Tutorial: Vixeno, Vixen Sequence Conversion for Arduino
Posted in Arduino Libraries, Tutorials by Bill
7 Oct 2012
If you haven’t seen videos of those awesome Christmas light shows that sync lights to music then you haven’t ever been on the internet. The software used to create those shows is actually pretty simple to use. Load up a music file, setup number of channels and go to town creating complicated fades, sparkles and other animations with ease. A show or light ‘sequence’ is really just an array of values feed to a controller when played back. I wanted to use a popular (and free!) light show creator called Vixen to create a short light show to be embedded in a project run by an Arduino. This is the script I wrote to do just that so you can too. This tutorial will walk you through using Vixen to create a light show and then how to use my script to embed it in your next micro-controller project. Here’s what I did this it: The Electronic Wedding Wishing Well
Background
We can think of a light show sequence as just a 2-dimensional array of values that represent the brightness lights should be. In this case the brightness of the lights is an 8bit number. So its value ranges form 0-255. Since just one channel of light is no fun, we can have lots of channels instead. This is the first dimension of the array. The second dimension is time, since we want to to have our lights vary over time. We break time up into ‘frames’ just like video. The number of frames a show will have depends on how long it is and how many frames per second (fps) the sequence is setup for.
Your project is going to need to have some way of controlling many channels of lights. You can use the 6 analog out channels the Arduino has built-in, or you can use various PWM expansion chips/shields available.
Since RAM in and Arduino is small (2k) let’s instead store the light show sequence in program space (32k). This tutorial is aimed for people who want to store a single short light show directly in the Arduino memory, as opposed to getting fancy with external storage like SD cards. That’s for another day. Paul at DorkBot beat me to it!
If you want the light show to playback with sound, I suggest this module as it is rather cheap and easy to use.
Here is a video of the project I used Vixen to complete:
Getting Started
So before we begin you first need to have Vixen and Python installed on your computer. Follow those links to download the respective programs. You will also need my converter script.
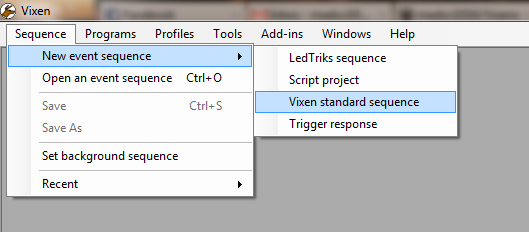
Next, start up Vixen and create a new sequence. Do this by selecting Sequence -> New event sequence -> Vixen standard sequence
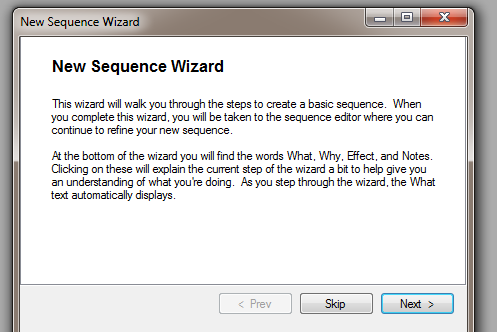
A Wizard will pop-up to help you create the Sequence. Click Next to continue.
The first thing it will ask you for is the event period. This is the time a single ‘frame’ of the sequence stays on. The smaller the number, the higher the ‘frame-rate’ the sequence has. But it comes at a cost of more memory required to store the sequence. 100ms means your show will have a 10fps (frames per second) rate. This is usually sufficient.
Next it will ask you about profiles. This is a way for you to store and recall a setup configuration. We will skip this. Hit next to continue.
After that is a screen asking you for the number of channels your setup has. Enter the number and then click ‘Create it’ at the bottom.
It will ask you to save the new sequence somewhere on your computer and name it. Save it to somewhere you can recall later.
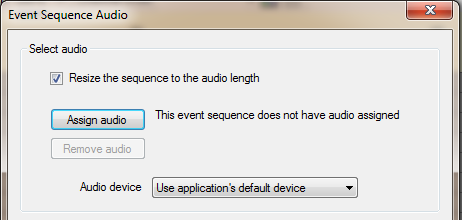
Now we are in the sequence editor. This first thing you will want to do is assign a music file if you are creating a sequence to music. Click the music note to open the assign dialog.
Click the “Assign audio” button and select your music file. When you are done select OK to close the Assign audio dialog box.
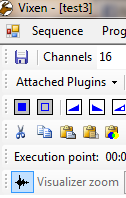
Right above the channel listing, click the waveform button to visualize your audio file. This helps for aligning light cues.
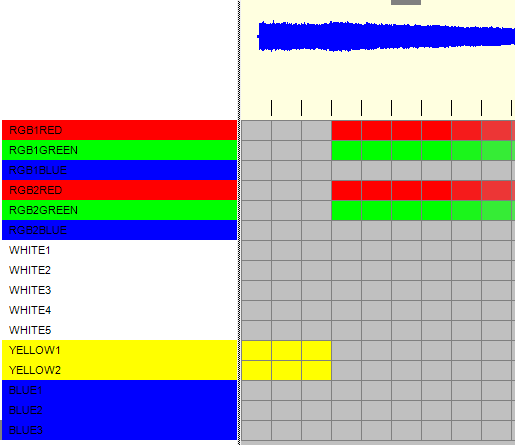
You can customize the name and color of your channels. Just right click on a channel name and select Channel properties. This will help you track what the channels do. For example, see how I setup the channels for a recent project:
Now it’s time to create your sequence. I’m not going to go into detail, but the basic usage is to select a block (or several blocks at once) and right click. This gives you a list of patterns you can apply. From just On to Off, to fancy sparkle and shimmer patterns as well. The best way to learn the different options is to just play around with them.
Vixen let’s you playback your audio while a slider goes past the current light frame. This helps to visualize what your project will look and sound like. The playback buttons are in the toolbar.
When you are done, you should have a show with some fancy light patterns or whatever you want it to be. Make sure you save the sequence, and close Vixen.
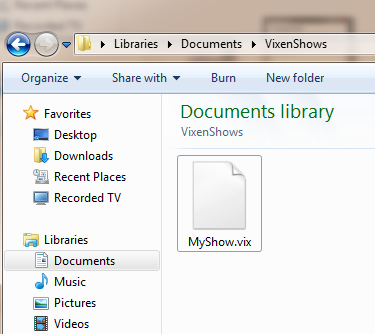
Now open a file browser window and navigate to where you saved the sequence. You should see a .vix file containing your sequence.
Copy my Vixeno script into this folder from the zip file you downloaded earlier.
Now open up a command prompt in that folder. The easiest way to do that is to backup once in your file tree (in my case going back to my Documents folder) and shift-right clicking on the folder that holds your Vixen Sequence file and the python script. Select ‘Open Command Window Here’.
 You should get a command window that is already navigated to your folder with your sequence file. In that window, type in
python Vixeno.py [YourSequenceFile].vix
So in my case:
And press enter. You should get some output with details about your sequence.
Notice that bit about bytes of memory? That’s how much space in your Arduino the show data is going to take up. An Arduino Uno only has 32,000 bytes to work with. Your code is going to take up at least 4-5k of space leaving about ~26,000 bytes for your show data. If you need to reduce the size of your show, increase the ‘Event Period’ of your show or remove some channels.
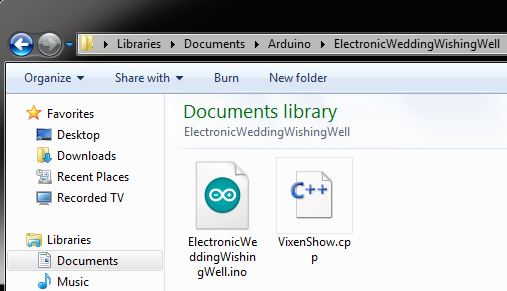
Close the command window. If you navigate a file browser back to where your sequence file was stored, you should now have a third file called “VixenShow.cpp”.
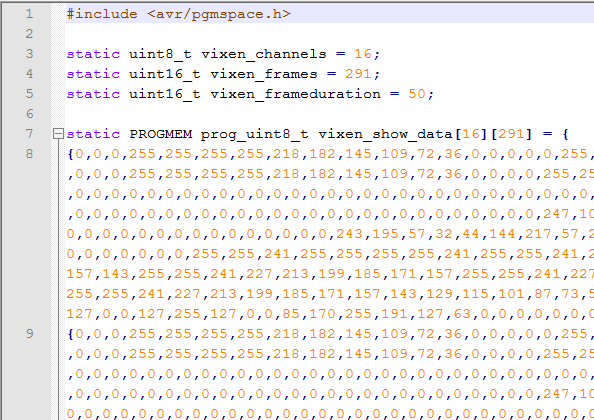
If you open the new file in a text editor, you should see some variables about your sequence and a array holding all the data of your light show. It is formatted for use directly with Arduino/AVR programming, but can easily be modded for other platforms.
Take this new file and copy it into your Arduino sketch folder with the sketch for your project.
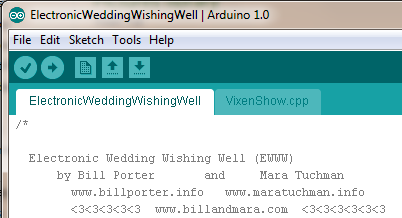
When you open up your Arduino project you should now see a new tab with the show data.
You will also need to add a line to include it in your project.
#include "VixenShow.cpp"
Now is the part that depends on your project. How are you using the data? Are you using a PWM Chip like the TLC5940? Using analog out pins directly? Or something else?
Your code should basically load up a frame into your analog out hardware, wait for a frame period to pass, and then load up the next frame. Here’s how I did it with a TLC5940 Shield:
  //start playing back show file and run LEDS
  for(int i = 0; i<vixen_frames; i++){
    start = millis();
    for(int y = 0; y<vixen_channels; y++){
      temp = pgm_read_byte(&(vixen_show_data[y][i]));
      temp = map(temp,0,255,0,4095); //scale to TLC range.
      Tlc.set(y, temp);
    }
    Tlc.update();
    delay(vixen_frameduration - (millis() - start));
  }
See how I used the static variables from the VixenShow file? They pass along the number of frames, channels and period so it’s easier to code a routine that plays back the file as it should. Also pay attention to how you pull out the data from the array.
temp = pgm_read_byte(&(vixen_show_data[y][i]));
This is because we stored the data in program space.
Here’s the full function that is called to playback the lightshow with music.
void playShow(){

  //start music track
  wtv020sd16p.asyncPlayVoice(0);
  delay(100);

  int temp = 0;
  long start = 0;
  //start playing back show file and run LEDS
  for(int i = 0; i<vixen_frames; i++){
    start = millis();
    for(int y = 0; y<vixen_channels; y++){
      temp = pgm_read_byte(&(vixen_show_data[y][i]));
      temp = map(temp,0,255,0,4095); //scale to TLC range.
      Tlc.set(y, temp);
    }
    Tlc.update();
    delay(vixen_frameduration - (millis() - start));
  }
}
You can see where I issued the command to start playing back the music: wtv020sd16p.asyncPlayVoice(0); Again, that depends on whatever hardware your project has to play sounds.
So that’s it. Hopefully this helped you quickly script and add a light show to your Arduino project. Keep in mind the data in the array can be used for anything, not just lighting up LEDs. You could map the 0-255 range to servo angles and script servo movements to a sound file.
As always, drop a comment below if you have a questions and please let me know if you make something cool with this!






Trackbacks / Pingbacks