


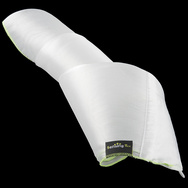
 During the rapid design and development phase of all the geeky items we were creating for our wedding Sparkfun listed a new item on their website; a large fiber optic sheet. We bought one with the idea of integrating it into Mara’s dress but had to figure out a way to light it up. In the end we didn’t end up using it for the wedding, but I did come up with a way to create a powerful light source for it and I’m sharing it for others to use.
Our Geeky Wedding – DIY 3D Printed Geek Wedding Table Centerpieces
Posted in Projects, Wedding by Bill
24 Mar 2013
Well, I’m pleased to say the #GeekWedding was a success and I am now a married man. The 3 weeks leading up to our wedding turned into a hack-a-thon of custom DIY projects we’ll be posting about over the coming months. We are going to wait out the 5-8 weeks it will take to get our wedding pictures before we post about many of the projects, but for a few we have enough media on hand to post about now. First up is our DIY custom 3D printed wedding centerpieces.
41 Comments // Read more..A while ago my ‘Science Brother’ and good friend Dan told me about a project he was planing. He had an impressive element collection and wanted to build an equally impressive display for his collection. His design consisted of a large custom shelving unit shaped to look like a periodic table. Each shelf was made from a small piece of acrylic and he wanted to add LED edge lighting in the color of the element’s periodic group. He was content with just wiring all the shelves to remain constantly lit. I was able to convince him adding a control system to the design would add another level of awesomeness to his project. What follows is the design of the system I created for him and the result. To read more about Dan’s project outside of the control system, checkout his blog.
4 Comments // Read more..Our Geeky Wedding – DIY Electronic Wedding Invitations (DEWI)
Posted in Projects, Wedding by Bill
29 Jan 2013
Next up in the progress towards our ultimate geek wedding are the wedding invitations! Not content with plain old paper invitations my fiancée Mara and I smashed our geeky heads together to come up with a design that keeps with our circuits and swirls theme. We decided to be more literal, by putting actual circuits into our invitations! However, time spent on design, production and cost were a concern. We had to make about 50 invitations to be sent out to our guests.
39 Comments // Read more..Our Geeky Wedding – Electronic Wedding Wishing Well (eWWW)
Posted in Projects, Wedding by Bill
8 Oct 2012
This is the first (and probably only one before the big day) post regarding my upcoming geeky wedding. This was one of those last minute “How can we make this our own?” efforts we wanted done in time for our engagement party. Mara had bought a cheap cardboard ‘Wishing Well’ for the party and our wedding. It was cute, but bland and uniform. We wanted to make it into something original and something that matched our theme ‘Circuits and Swirls’. So we turned it into the ‘Electronic Wedding Wishing Well’.
8 Comments // Read more..Tutorial: Vixeno, Vixen Sequence Conversion for Arduino
Posted in Arduino Libraries, Tutorials by Bill
7 Oct 2012
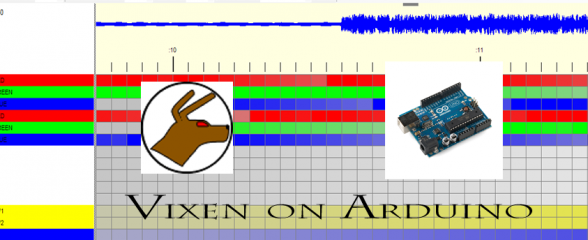
If you haven’t seen videos of those awesome Christmas light shows that sync lights to music then you haven’t ever been on the internet. The software used to create those shows is actually pretty simple to use. Load up a music file, setup number of channels and go to town creating complicated fades, sparkles and other animations with ease. A show or light ‘sequence’ is really just an array of values feed to a controller when played back. I wanted to use a popular (and free!) light show creator called Vixen to create a short light show to be embedded in a project run by an Arduino. This is the script I wrote to do just that so you can too. This tutorial will walk you through using Vixen to create a light show and then how to use my script to embed it in your next micro-controller project. Here’s what I did this it: The Electronic Wedding Wishing Well
26 Comments // Read more..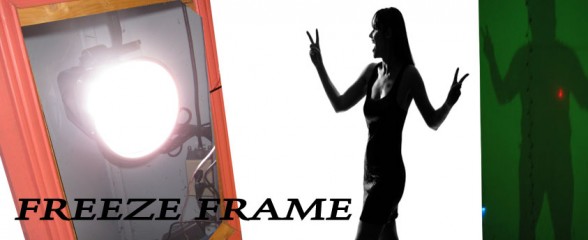
As you may have seen already, I enjoy volunteering for the local Science Museum. This time I took on rebuilding one of my favorite exhibits, Freeze Frame. The exhibit is simple, guests stand in front of a photo sensitive wall while a flash activates to ingrain their silhouette in the wall for a few minutes. The museum had one that had long since died and the previous volunteers simply ripped out all the parts except the photo sensitive wall and added an LED on a pen to let patrons ‘write with light’. While interesting, it’s not the same awe inspiring effect as Freeze Frame, so I took it on myself to resurrect the original function. This is how I did it.
36 Comments // Read more..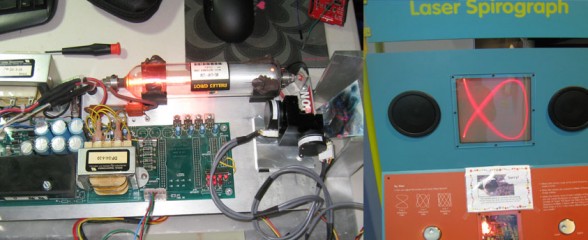
My favorite local museum the Science and Discovery Center of Northwest Florida had broken exhibit that was collecting dust. They asked if I could fix it, and never one to back down from a challenge I set out to bring the Laser Spirograph back to life. What follows is how I fixed it and added options for new features!
17 Comments // Read more.. The Sparkfun MP3 Player Shield for Arduino is a inexpensive and easy way to add MP3 playback capability to your Arduino project. But it was lacking an easy to use Arduino Library to go along, so I fixed that. Introducing the SFEMP3Shield library just for this shield. Now playing an MP3 files is as easy as MP3player.playTrack(5); and all the work is done behind the scenes.
 It seems my blog has been a big enough success that Newark recently approached me asking if I’d be interested in reviewing products. I agreed and here we are; my first product review. I chose to review something I have had my eye on for a while. Until now, I’ve always used tweezers to place SMD chips on circuit boards for soldering. I’ve been wondering if the vacuum pickup tools would make the job easier and quicker. Since I did not test multiple vacuum tools, I am writing this review as a comparison to using tweezers.